Setup an email account in Microsoft® Outlook® XP or 2003
Before you begin, make sure you have your email account setting provided by Newt.
Step 1: Open Microsoft Office Outlook Express
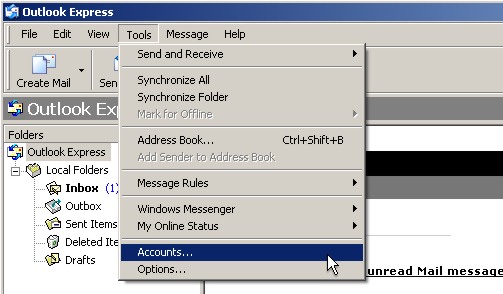
Step 2: From the "Tools" menu, select "Accounts"
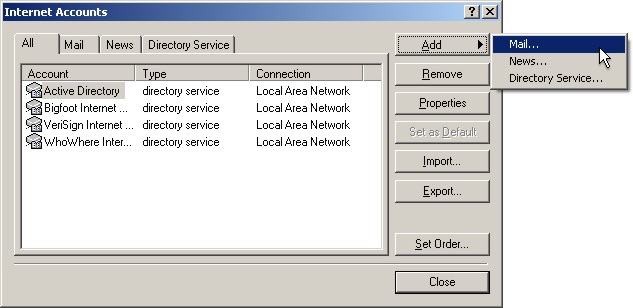
Step 3: Click Add, then select Mail. The Internet Connection Wizard dialog box appears.
![]()
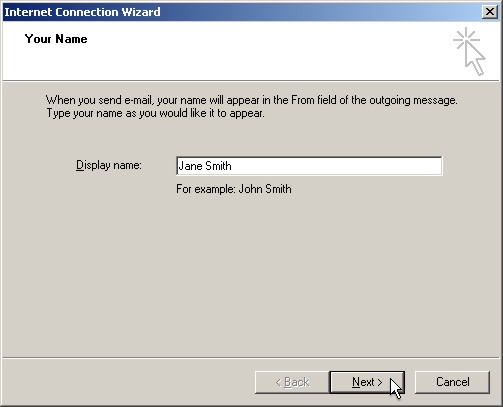
Step 4: In the "Display Name" field, type your name, then select "Next"
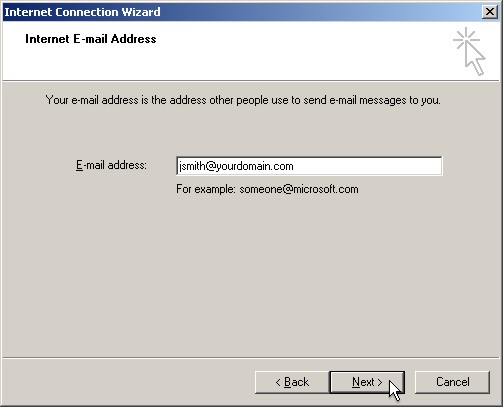
Step 5: In the "E-mail address" field, type your e-mail address, then select "Next"
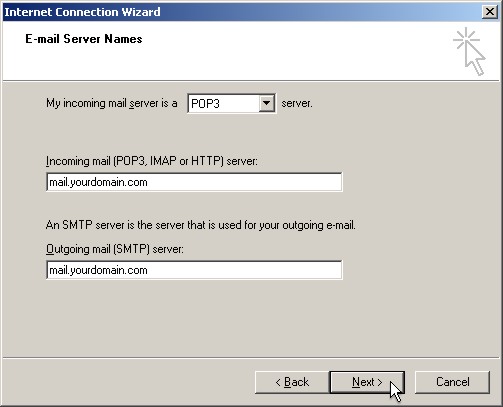
Step 6: In the :My incoming mail server is a: drop-down menu, verify that "POP3" is selected
Step 7: In the "Incoming mail" server field, type mail.yourdomain.com
Step 8: In the "Outgoing mail" server field, type mail.yourdomain.com, then select "Next"
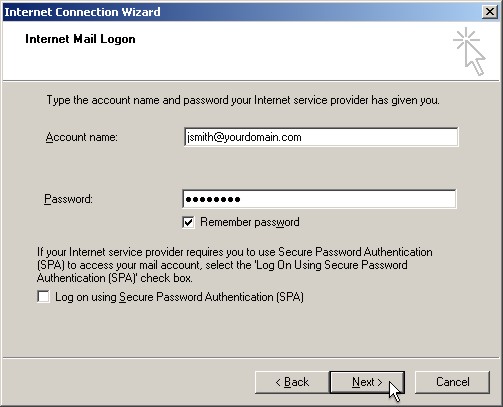
Step 9: In the "Account name" field, type your email address
Step 10: In the "Password" field, type your password
Note: Selecting the Remember password option lets Outlook Express connect to your
mailbox without asking you for your password. Enabling this feature is optional.Step 11: Select "Next"
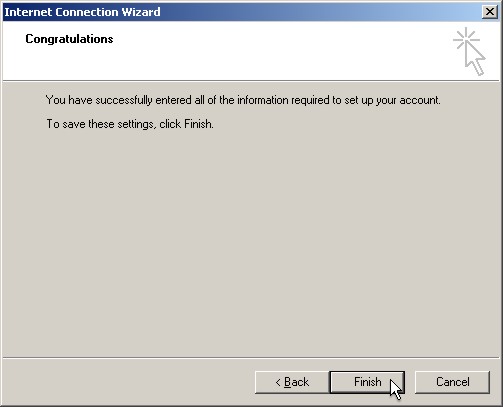
Step 12: Click "Finish" to save the new e-mail settings
A few more setting must be be made before you can start using you email account.
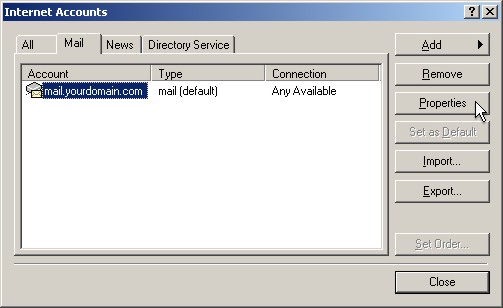
Step 13: Select the "Mail" tab
Step 14: Select you new email account, and then select "Properties"
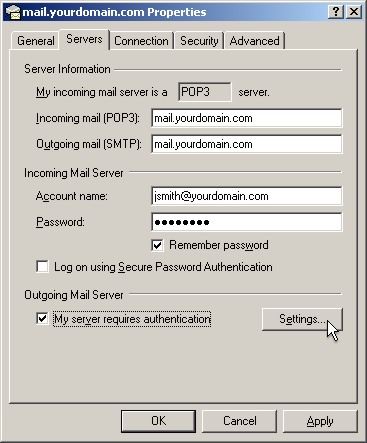
Step 15: Select the "Servers" tab
Step 16: Select the "My server requires authentication" check box, then select "Settings"
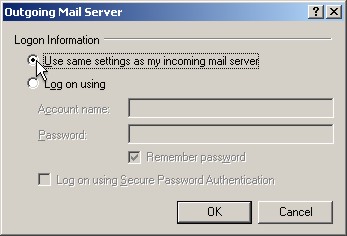
Step 17: Verify "Use same settings as my incoming mail server" is selected, then click "OK"
Step 18: Click OK to save the mail account.
Step 19: Click Close to close the Internet Accounts dialog box.
This should have successfully added an email account to your Microsoft Outlook. If you are having difficulty with accessing you new account follow the following steps.
Step 1: Open Outlook Express
Step 2: From the "Tools" menu, select "Accounts"
Step 3: Select the "Mail" tab, then click once on your email account.
Step 4: Click "Properties"
Step 5: In the "General" tab, verify your name and e-mail address
Step 6: Select the "Servers" tab
Step 7: Verify the following settings:
In the "Incoming mail (POP3)" field, re-type mail.yourdomain.com
Step 8: Select Settings.
Step 9: Verify "Use same settings as my incoming mail server" is selected, then select "OK"
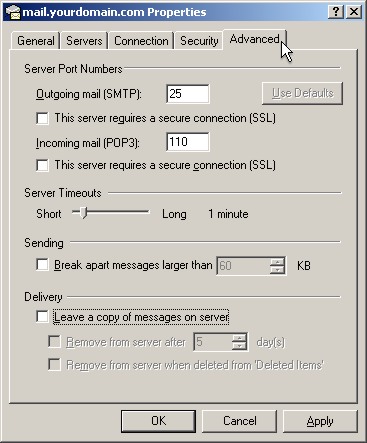
Step 10: Select the "Advanced" tab
Step 11: Verify that the "Outgoing Mail (SMTP)" server port number is set to 25
Step 12: Verify that the "Incoming Mail (POP3)" server port number is set to 110
Step 13: Verify the option "Leave a copy of messages on server" is not selected
Step 14: Click "OK"
Step 15: Click "Close" to close the "Internet Accounts" window.
If you are still having difficulty accessing you email account please contact us